Boom End Flush Valve
Handle Improvement
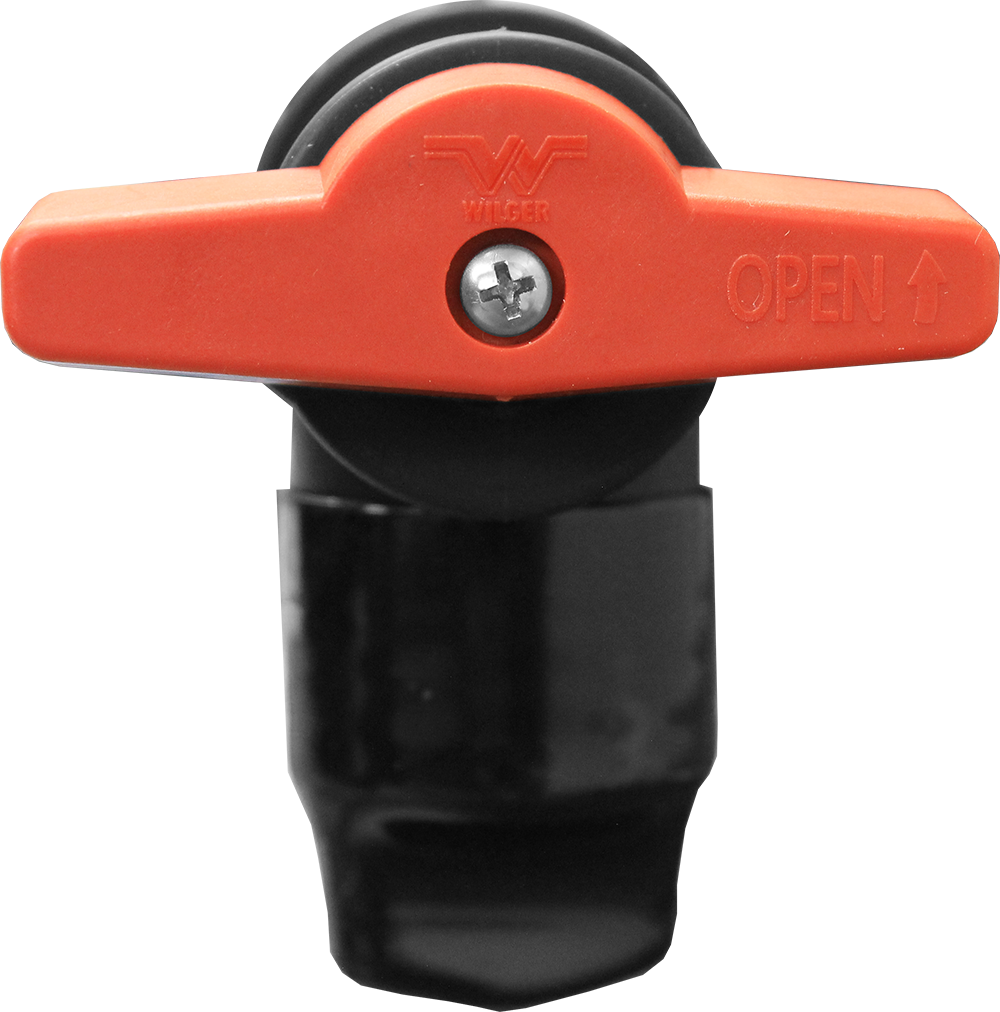
By user request, we now have a boom end flush valve (BEFV) with a longer handle, which also gives a clearer indication when the valve was in open/closed position.
The new flush valve handle is completely retro-fittable to existing flush valves shorter handles, and can be easily replaced.
The new part number for the new boom end flush valves with their handles are as follows:
| SHORT HANDLE | LONG HANDLE | DESCRIPTION |
|---|---|---|
| #25175-V0 | #25175-LV0 | Boom End Flush Valve (BEFV) for Quick Nut Stainless Steel Booms |
| #25176-V0 | #25176-LV0 | Boom End Flush Valve for 1″ Pipe Thread |
| #41402-V0 | #41402-LV0 | Boom End Flush Valve for Case Thin Wall Stainless Steel (TWS) Booms |
FULL Bulletin PDF & Overview
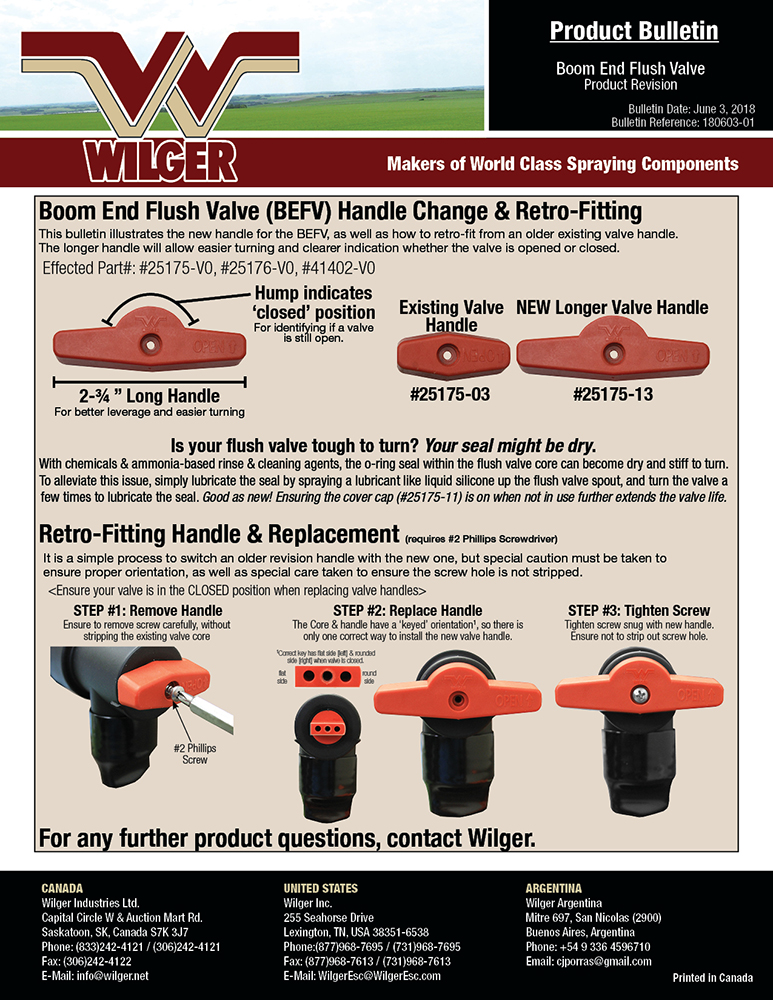
For a copy of the full bulletin, either click the image, or visit the DOWNLOADS section of the www.wilger.net website HERE.
Parts Number Changes & Parts Effected
[Updated Nov 2018] The long handled boom end flush valve will be treated as a seperate part number.
For the boom ends that might be subject to brush contact, there has been request that we keep the short handled flush valve as one part number, and maintain a new part number for the long handled version. Apologies for any confusion that arose from our original intent to replace the short handled valve.
| SHORT HANDLE | LONG HANDLE | DESCRIPTION |
|---|---|---|
| #25175-V0 | #25175-LV0 | Boom End Flush Valve (BEFV) for Quick Nut Stainless Steel Booms |
| #25176-V0 | #25176-LV0 | Boom End Flush Valve for 1″ Pipe Thread |
| #41402-V0 | #41402-LV0 | Boom End Flush Valve for Case Thin Wall Stainless Steel (TWS) Booms |
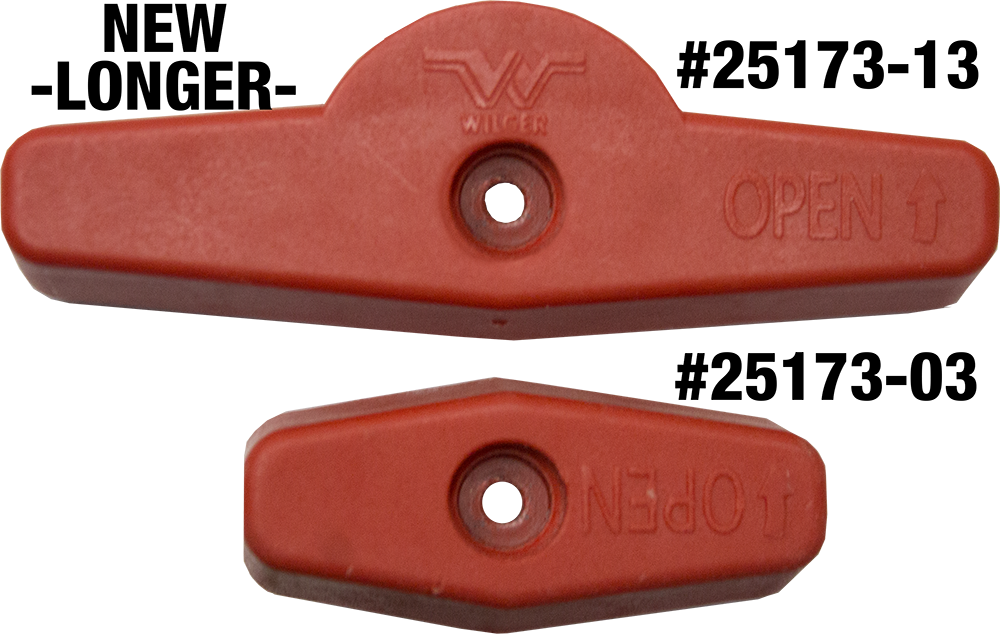
For retro-fitting existing parts in stock, or on application equipment, ordering the handle #25175-13 separately (& retro-fitting) is cost effective, and minimizes waste. The older style handle (#25175-03) will remain available for now for any applications that need the smaller handle.
Both handles will be kept to the same cost, so there is very little reason to not use the new #25175-13 handle.
Retrofitting Instructions
It is a simple process to switch an older revision handle with the new one, but special caution must be taken to
ensure proper orientation, as well as special care taken to ensure the screw hole is not stripped.
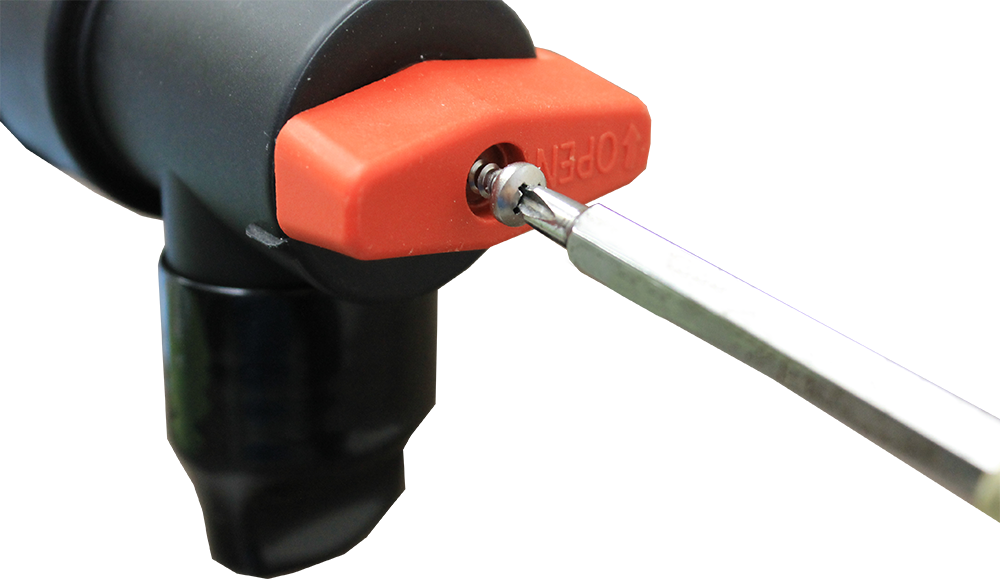
STEP 1: Remove the old handle with a #2 Phillips screwdriver. (Ensure valve is closed when being replaced)
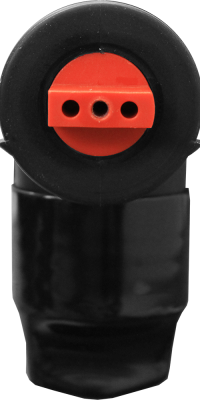
STEP 2: Replace new handle incorrect orientation. The core’s flat side should be to the left, and rounded side should be on the right (IF valve is in closed position).


